Rabot 101: Setting up your Shelf Mount
Last updated: April 6, 2026
We are excited to get you started with setting up the Rabot Hardware. Before you begin, verify you have all the hardware parts:
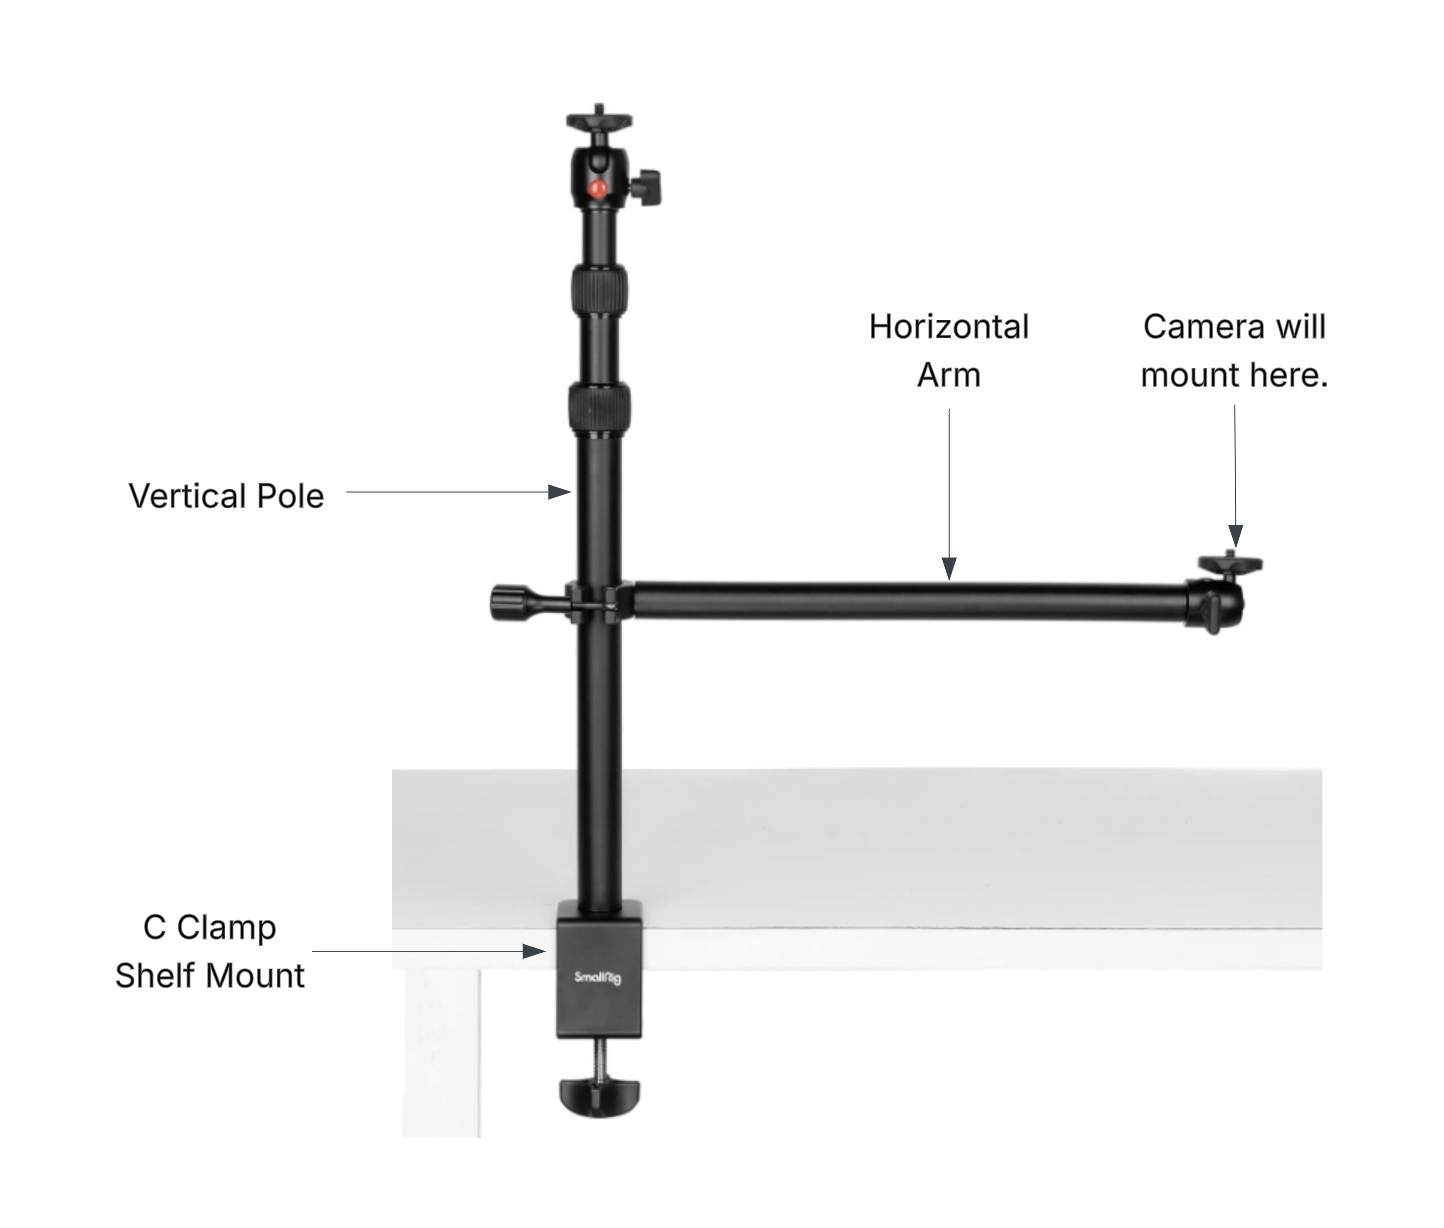
Vertical pole (adjustable height, 13"/33.5cm)
Horizontal Arm (14inch/35.5cm reach)
C-clamp Shelf Mount with tightening knob
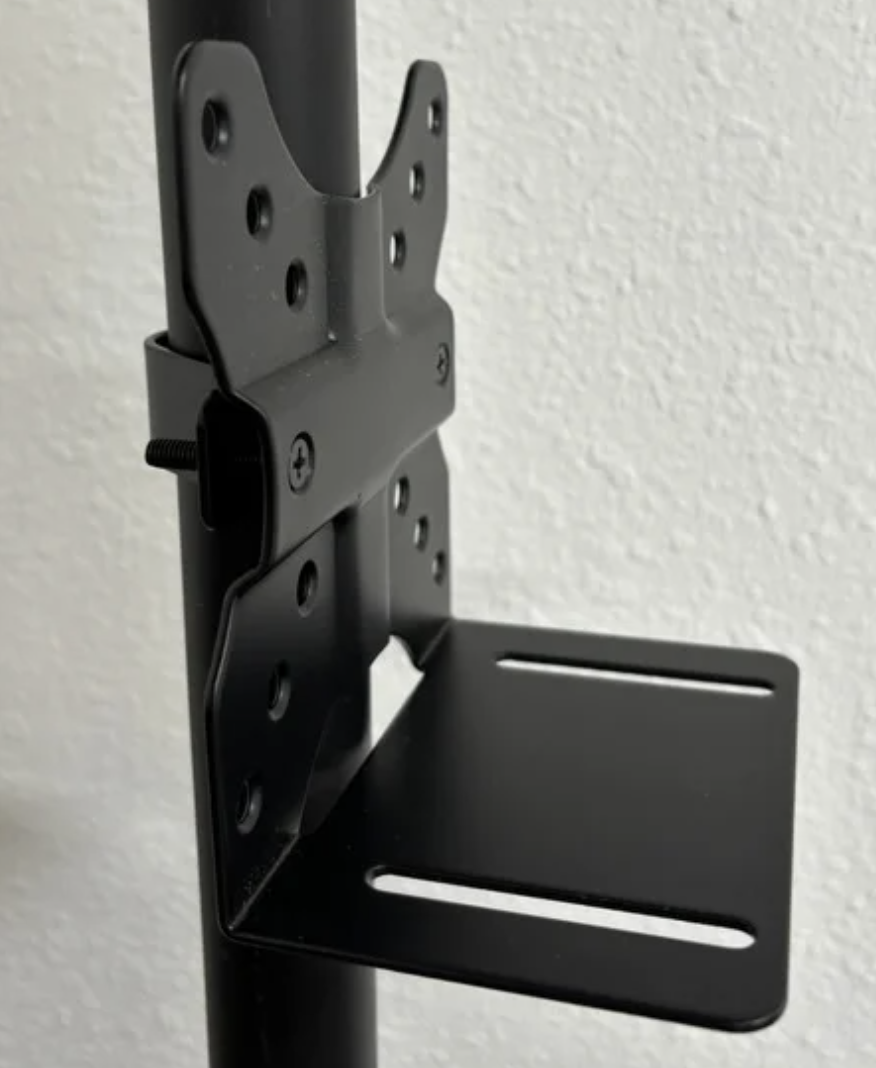
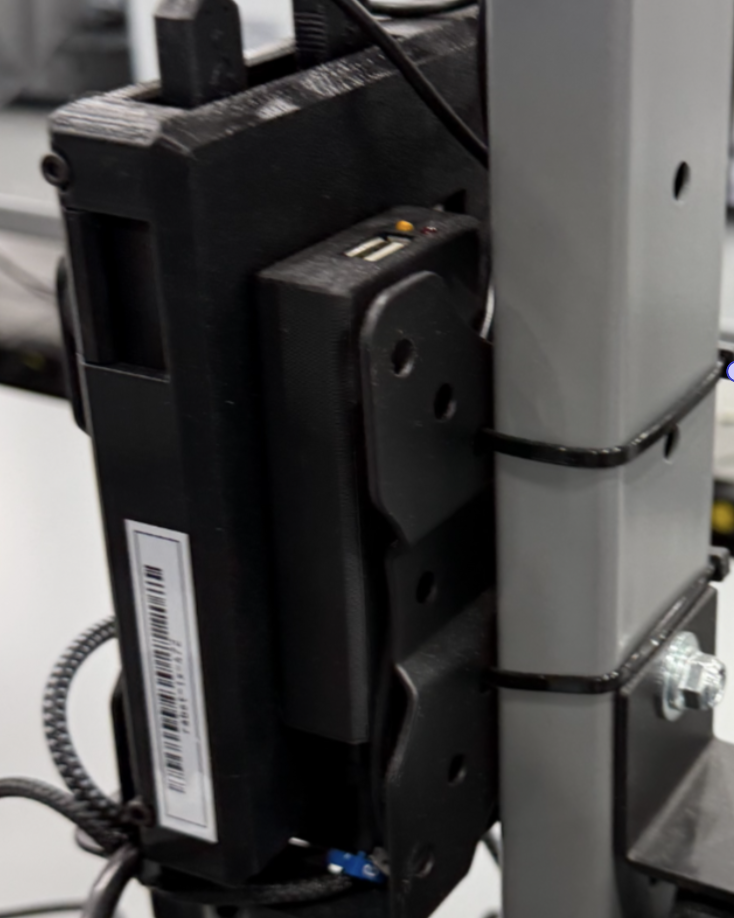
Rabot Edge Hardware on a Human centric bracket
Installation Instructions
Step 1: Attach the Camera to the Horizontal Arm
Mount your camera onto the end of the horizontal arm first on the swivel ballhead. This allows you to easily manage and route the camera cable before installation. Make sure the camera is securely attached.
Step 2: Attach the Horizontal Arm to the Vertical Pole
Connect the horizontal arm to the vertical pole at a height that will position your camera 45-51 inches above your pack table work surface. Secure the arm in place at your desired height.
Step 3: Attach the Pole to the Shelf
Place the C-clamp on the edge of your pack station shelf where you want to mount the camera. Turn the bottom knob clockwise to tighten the clamp until the mount is firmly secured to the shelf and does not wobble. The mount should feel solid and stable.
Step 4: Connect your Edge Hardware Securely
Securely Mount Your Edge Hardware The Edge Hardware includes a human-centric mount with components designed to attach to the pack station's poles or shelves. Position the mount where camera cables can easily connect.
Step 5: Connection all the cables
You are now ready to connect the cables to establish connectivity with the camera, status light (andon light), barcode scanners, and other devices. Refer to this article for a complete overview of all required hardware connections: https://help.rabot.us/en/articles/11571713-rabot-101-installing-rabot-plus-hardware
You are now ready to use the Rabot Hardware!
Tips for Best Results for your Mounting Needs
The camera should be positioned at approximately a 53 inches above the pack station work surface
Ensure the clamp is tight enough that the mount doesn't shift during use
Route cables neatly along the arm and pole to keep your workspace organized
Additional Resources:
Mount Instructional Video: